
How to Fix Eyebrows: Lighten, Darken & Neutralize Brassiness
By Nnaja Diogu & Aryiah Brown
How to Fix Eyebrows: Lighten, Darken & Neutralize Brassiness
By Nnaja Diogu & Aryiah Brown
Did you just get your brows tinted—at home or by a pro—and the result isn’t what you hoped for? Don’t worry.Most mishaps fall into three camps: too dark (depth), too light, or a warm/brassy undertone. In this guide, we’ll help you quickly spot what went wrong and choose the right at-home tools. You’ll see exactly what to try in the first 24 hours after tinting versus days 2–10—whether that means gently lifting extra depth, adding richness to a too-light result, or cooling down warmth without over-processing. And because safety comes first, we’ll keep it simple: always patch test, skip acids and retinoids around the brows for 48–72 hours, and stick to eye-area-safe products. Clear steps, smart shortcuts, better brows. Let's get started.
Brows Too Dark (Fresh Tint: 0–24 Hours)
First things first: let’s talk about fading the color safely—without stripping your skin.
Step-by-step (what to do in the first 24 hours):
- Oil cleanse (60–90 sec): Massage a few drops of mineral or squalane oil into brows (it should help to melt the pigment), then rinse.
- Gentle lather: Wash the area with a mild, sulfate-free cleanser; rinse well.
- Spot-treat stains: Dab Godefroy Eyebrow Tint Stain Remover on stubborn areas per instructions, wait briefly, then neutralize/rinse.
- Repeat oil cleanse (optional): Do one more quick oil cleanse if needed. Stop if you feel any sting, redness, or dryness.
- Kitchen quick fix (optional): You can also mix equal parts water and baking soda into a loose paste. Apply a tiny amount onto brow hairs only (avoid skin), leave for 2-3 minutes max, then rinse and evaluate the tint.

What not to do
- Don’t scrub with rough exfoliants, toothbrushes, or washcloth “buffing.”
- Don’t use acids, retinoids, or peroxide near the brows for 48–72 hours.
- Don’t apply pure hydrogen peroxide, bleach, or hair-lightener to brows.
- Don’t soak brows in hot water or steam repeatedly (can irritate skin).
- Don’t over-repeat the baking-soda method—use sparingly to avoid dryness.
- Don’t tug, pick, or use adhesive tape to “lift” color from hairs or skin.
Still Too Dark (Day 2–10): Controlled Lift or Re-Tint Lighter
Now that you’ve done a gentle fade, here’s how to fine-tune depth and tone—carefully and with a timer in hand.

Step-by-step (targeted correction, days 2–10):
- Re-apply Tint Remover (only where needed): Tap a tiny amount onto the darkest spots, keep contact time short, then neutralize and rinse per direction.
- If the whole brow is still too deep: Use Godefroy Eyebrow Lightening Crème for a one/to two shades of lift. Be sure to set a timer and check every 30–60 seconds. Rinse thoroughly.
- Retint smarter: Once brows are dry, re-tint with a lighter and/or cooler shade at 50–75% of your usual processing time to keep in control.
- Be kind to skin: If the area feels irritated, condition (light, fragrance-free moisturizer) and pause any re-tinting for 72 hours.
Pro tip: Do a strand/spot test on the tail first to preview the new color before committing to the full brow.
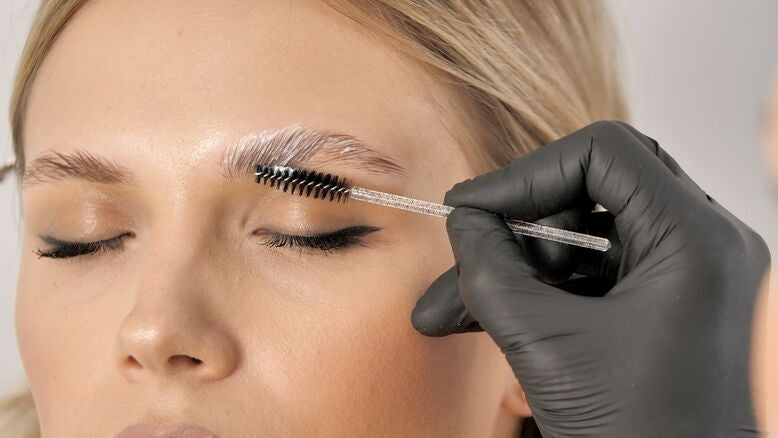
Over-Bleached or Orange/Brassy Brows: Neutralize, Don’t Overprocess
So your brows turned orange, yellow, or brassy after bleaching:don’t panic. This is one of the most common outcomes when the undertones of your natural pigment start showing through. Bleaching lifts the melanin out of hair, but it doesn’t always do so evenly. Depending on how long the lightener was left on, you may expose orange, yellow, or red undertones instead of achieving a clean, neutral base. As explained in our blog: How to Safely Bleach Your Brows at Home: A Step-by-Step Breakdown, over-processing or skipping toning is what usually causes these warm tones to appear.
- The Neutralization Map
- Orange → Correct with a blue-based ash brown tint to cancel out warmth.
- Yellow → Use a violet-balanced neutral brown to restore depth without adding red.
- Red → Opt for a green-leaning cool brown to neutralize rosy undertones.
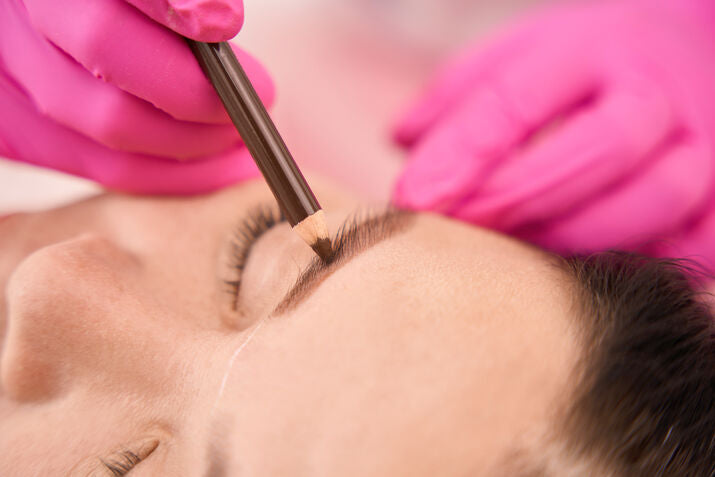
Step-by-Step: How to Fix It
- Prep properly: Start with clean, dry brows. Apply a thin layer of petroleum jelly around the brows to protect the skin.
- Mix and apply a corrective tint: Choose a cool- or ash-based shade according to the neutralization map. Apply evenly from the arch outward, where brassiness tends to show first.
- Process lightly: Keep the tint on for a shorter time—check every 1–2 minutes. Stop as soon as the warmth softens to a balanced neutral (aim for natural beige-brown tones, not gray).
- Rinse and condition: Use a gentle cleanser or damp cotton pad to remove the tint, then follow with a hydrating conditioner or a drop of squalane oil to replenish moisture.
- Repeat only if needed: Wait at least 48–72 hours before attempting another round. This gives your skin and brow hairs time to recover.

What Not to Do
- Don’t re-bleach to “fix” brassiness; this only weakens and breaks brow hairs.
- Don’t layer multiple tints in one session; you’ll risk muddy, uneven results.
- Don’t use purple shampoo or hair toner on the brows; these are not formulated for the delicate eye area and can cause burns or irritation.
- Don’t overcorrect toward gray or black cool tones are meant to neutralize warmth, not darken drastically.
- Don’t skip conditioning after bleaching or tinting; hydrated brow hairs hold color more evenly in future applications.
Need to Lighten Brows Evenly (Without Brass)?
- Sometimes, your goal isn’t a full lift; it’s simply to soften the depth of your tint by one or two levels while keeping the tone balanced and natural. Uneven lightning or brassiness usually happens when the lightener is left on too long or applied unevenly. The key is to move slowly and focus on timing, saturation, and even coverage.
Step-by-Step: How to Lighten Safely and Evenly
- Start with clean, dry brows. Make sure there’s no oil, makeup, or skincare residue.
- Apply Godefroy Eyebrow Lightening Crème evenly from the arch outward using a precision applicator or cotton swab. Spread in thin, consistent layers to avoid hot spots.
- Watch closely. Lightning happens fast—check every 30–60 seconds. The goal is a soft lift, not full bleach.
- Rinse thoroughly with cool water and gently pat dry.
- Seal and soothe. Apply a lightweight, fragrance-free balm or a drop of squalane oil to rehydrate the skin and brow hair.
- Post-care: Avoid exfoliants, acids, or retinoids around the area for at least 48 hours to let the skin barrier recover.
- Pro Tip: When in doubt, under process first. You can always go lighter in another session—but you can’t easily reverse over-lightening.

Keep Color Balanced: Aftercare, Shade Choosing & When to See a Pro
- Once your brows are back to the tone and depth you love, maintenance becomes everything. The difference between brows that fade gracefully and those that turn patchy or brassy often comes down to your aftercare routine and how you approach your next tinting session.
Aftercare to Extend Results
- Use mild, sulfate-free cleansers and avoid scrubbing or rubbing the area for at least 2–3 days of post–service. Skip acids, exfoliants, and retinoids during this time to prevent barrier disruption and color fading. A daily swipe of a soft stoolie helps redistribute natural oils, keeping your brow hair conditioned and healthy. And don’t forget SPF to apply sunscreen around the brows (not directly on them) to protect pigment from UV fade.
Shade & Undertone Tips
- If your brows tend to pull warm, stick to cool or neutral-based shades when tinting or toning. For fine or porous brow hairs, shorten processing time these hairs absorb pigment quickly, meaning a few extra minutes can shift color too dark or too warm. When testing new shades, always start light and build depth gradually.
When to See a Pro
- If you notice persistent redness, uneven breakage, or dramatic color swings between sessions, it’s time to consult a licensed professional. Likewise, if you’ve ever experienced a reaction or burning sensation, get a patch test before your next tint. A pro can help recalibrate your tone safely and guide you back to health, even brows.
- Healthy brows are balanced brows: the right aftercare, mindful timing, and smart color choices will keep yours looking fresh, full, and beautifully natural between every session. Thanks for reading! If you missed it, click here to check out last week's blog.
Read More
-

Why Beauty Is Moving Toward Simple, Multi-Step-Less Routines
Andrew CampbellBeauty culture Why Beauty Is Moving Toward Simple, Multi-Step-Less Routines The new luxury in beauty is not a longer shelf....
-

Why are my eyebrows thinning and what can I do about it?
Andrew CampbellThinning eyebrows are a common concern that many people experience for a variety of reasons. As you age, the hair...
-

Skin Barrier Products Take Center Stage
Andrew CampbellSkin Barrier Products Take Center Stage Taking care of your skin is one of the most important preliminary steps...


